
Fitting photos
A photo covering its tile is cropped. These options choose which tile each photo goes in, how it's cropped, and whether it's cropped at all.
Matching photos to tile shapes
With aspects (one width / height per child), each child goes in a tile of similar shape, so object-fit: cover crops as little as possible: landscape photos in wide tiles, portraits in tall ones.


/** Matching photos to tile shapes: portraits in the upright boards, landscapes in the flat ones. */
export function matching() {
  const layout = createLayout({ region: { x: 0, y: 0, width: 220, height: 140 }, tiling: herringbone({ length: 56, width: 28 }), gap: 2.5 });
  return {
    "in-order": renderToString(layout, { images, background: "#e9e3d8" }),
    matched: renderToString(layout, { images, imageAspects: aspects, background: "#e9e3d8" }),
  };
}- What's minimized: the arrangement minimizes the total crop, measured as the difference in log aspect ratio. Matching in sorted order solves that exactly.
- Which tiles: by default the same tiles are used as without matching (per
placement), only rearranged.choose="shape"also picks which tiles get content by their shape, e.g. the upright bricks of a herringbone for portraits. - Featured tiles still take the first children.
- Order: children's order no longer follows reading order when matching.
In React, useImageAspects(srcs) loads the images and returns their aspects. The SVG renderers take imageAspects, and matchSlots(layout, aspects, { cells, placement, choose }) in core returns the item for each cell.
const aspects = useImageAspects(photos);
<TileLayout options={options} aspects={aspects} choose="shape">
  {photos.map((src) => <img key={src} src={src} alt="" style={coverStyle} />)}
</TileLayout>
Safe areas
Content normally fills its tile's bounding box and is clipped to the tile's shape, so text in a triangle or hexagon loses its corners. With safeArea, each tile's content goes in a box at the tile's safe area: the largest rectangle that fits inside its shape (holes and rounded corners included), centerd where it could slide. Add aspects and each box has its child's own shape, so a photo or card shows whole and uncropped, as big as the tile allows.
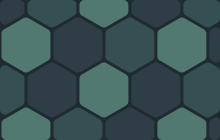
/** Safe areas: each photo whole and uncropped, as big as its hexagon allows. */
export function contain() {
  const layout = createLayout({ region: { x: 0, y: 0, width: 220, height: 140 }, tiling: hexagonal({ size: 30 }), gap: 3, cornerRadius: 5 });
  return renderToString(layout, { images, imageAspects: aspects, imageFit: "contain", fill: ["#2f3e46", "#354f52", "#52796f"], background: "#1e2b30" });
}<TileLayout options={{ region, tiling: hexagonal({ size: 60 }) }} safeArea>
{labels.map((t) => <p key={t} style={{ margin: 0, height: "100%", display: "grid", placeItems: "center" }}>{t}</p>)}
</TileLayout>- The box: it has
data-safe-area, and every tile shows itsfillround it. - SVG:
imageFit: "contain"(on<SvgTileLayout>orrenderToString) draws each image whole inside its cell's safe area, at itsimageAspectsshape. - Core:
safeArea(cell, layout, { aspect })returns the rectangle in layout units, andsafeAreaCss(cell, layout, { aspect })places it inside the cell's element. It works for any shape, convex or not, and is cached per cell. Withoutaspectit finds the largest-area rectangle of any shape. - Window layouts: with
edges: "window", tiles cut by the region fit the whole tile unless you ask for"visible".
Focal points
A photo covering its tile is cropped round its middle, which can lose the subject in a triangle, a tall thin tile, or a tile the region's edge cuts. Give each photo a focal point, as fractions of its width and height, and its tile moves the photo so that point is as near the middle of what shows as covering the tile allows.


/** Focal points: the sun in each photo stays in view, even in a tall, thin tile. */
export function focus() {
  const layout = createLayout({ region: { x: 0, y: 0, width: 220, height: 140 }, tiling: grid({ width: 27.5, height: 140 }), gap: 3 });
  return {
    centerd: renderToString(layout, { images, imageAspects: aspects, background: "#e9e3d8" }),
    focused: renderToString(layout, { images, imageAspects: aspects, imageFocus: photoFocus(30), background: "#e9e3d8" }),
  };
}const focus = useImageFocus(photos); // or your own: [{ x: 0.3, y: 0.25 }, …]
<TileLayout options={options} focalPoints={focus}>
{photos.map((src) => <img key={src} src={src} alt="" style={coverStyle} />)}
</TileLayout>- How it's applied: each tile sets
--andamento-object-position, whichcoverStyleuses asobject-position. Usevar(--andamento-object-position)with your own styles. - Exact placement: it's exact when the photo's shape is known, from
aspectsor a focal point's ownaspect({ x, y, aspect };useImageFocusincludes it). Without it, the focus is used as theobject-positionpercentage as it is. - The target: the middle of the tile's safe area, so in a window layout it's the part that shows.
- Guessing the focus:
estimateFocus(pixels)in core finds the spot whose color and brightness stand out most from their surroundings, leaning a little to the middle. It suits a subject against a plainer background; for busy pictures, give the focus yourself.useImageFocus(srcs)in React loads each image and runs it. - Other renderers:
- Vue takes
focalPointstoo. <andamento-layout>readsdata-focus="0.3 0.25"on children, or afocalPointsproperty, andmountTileLayouttakesfocalPoints.- SVG and canvas take
imageFocus(by position inimages) withimageAspects, or focal points with anaspect. The canvas renderers measure the images themselves. - In core,
coverRect(cell, layout, { aspect, focus })gives where to draw an image, andobjectPosition(…)the CSS for it.
- Vue takes